How to Use AutoCut Podcast
On Premiere Pro:
On DaVinci Resolve :
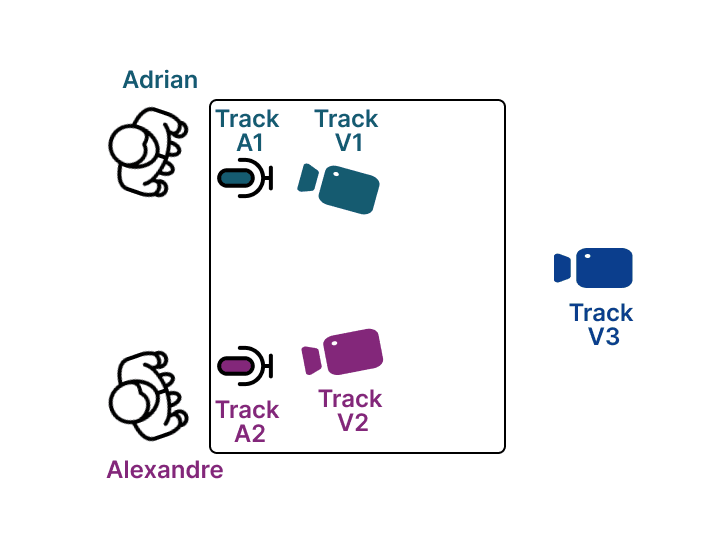
As an example, we will use a Podcast with this setup:
1. Define Participants and Assign Their Audio Tracks
To start, you need to define 'participants' for each person speaking in your video podcast. Click 'Add Participant' for each speaker. Then, assign the corresponding audio track to each participant. In our example, we have 2 participants: Adrian & Alexandre.
- Adrian's microphone is on audio track A1 in the Premiere Pro/DaVinci timeline
- Alexandre's microphone is on audio track A2 in the Premiere Pro/DaVinci timeline

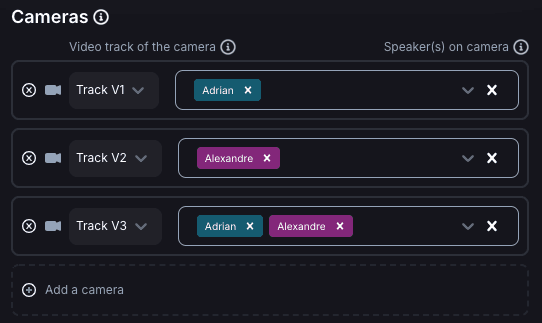
2. Define Cameras and Assign Visible Participants
After defining the participants, you need to set up the cameras and specify which participants are visible on each camera. For a "wide" camera shot with multiple participants visible, select all visible participants.
In our example:
- On video track V1, only Adrian is visible
- On video track V2, only Alexandre is visible
- On video track V3, both Adrian & Alexandre are visible
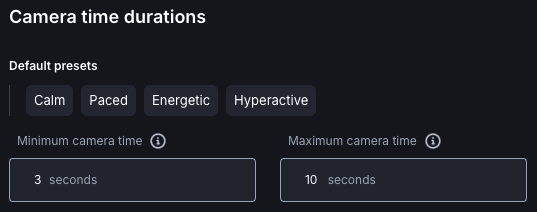
3. Set Camera Appearance Duration
AutoCut Podcast allows you to define maximum and minimum durations for each camera, to better control shot transitions. By setting these durations, you ensure a camera is neither used too fleetingly nor too lengthily.
Use the available presets to tailor the editing to your style.
4. Launch AutoCut Podcast
Once your settings are configured, click the arrow next to the "Edit" button to select the desired editing option. And you're ready to go!
For more details on AutoCut Podcast settings, refer to this article: AutoCut Podcast Settings
Table of contents