How to Install a Font on AutoCaptions?
Introduction
AutoCut Captions utilizes system fonts, so to use a new font, you must install it on your system.
The best way to do this is to use Google Fonts.
Google Fonts offers a wide range of free and open-source fonts that you can use to enhance the visual appeal of your subtitles in AutoCut Captions. In this tutorial, we will guide you through the steps to install Google Fonts on macOS and Windows systems.
Install a Google Font on Windows
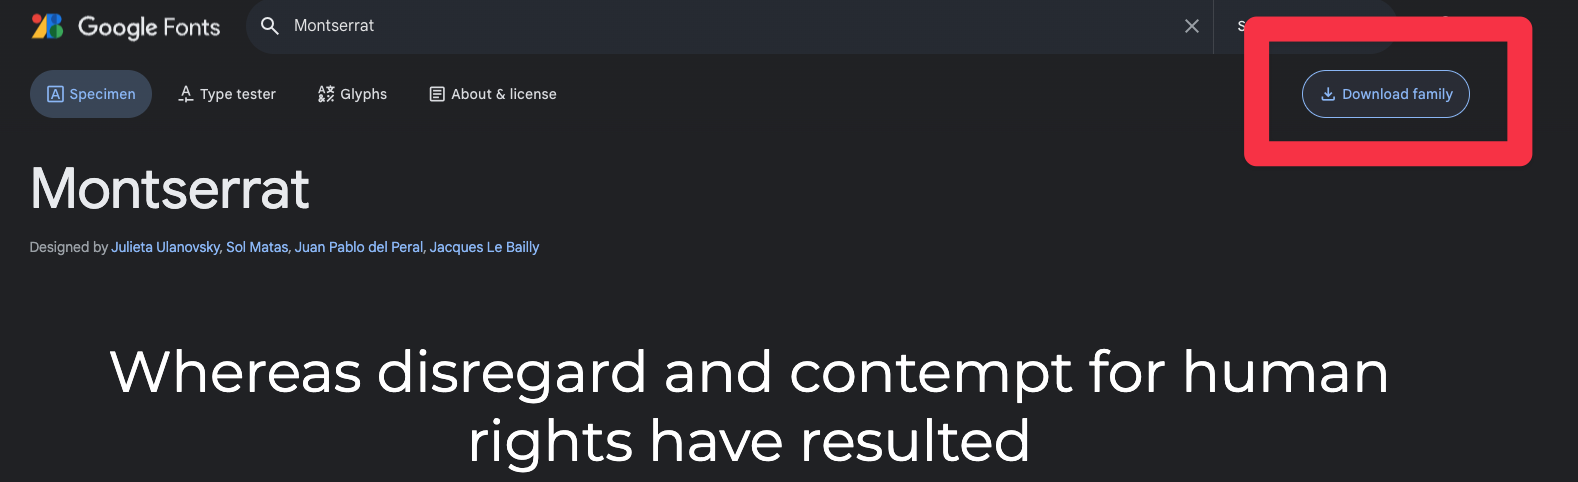
1. Visit Google Fonts
Navigate to the Google Fonts website and look for a font that suits your project.
2. Download the Font
Choose the desired font and download it by clicking on the Download family button.
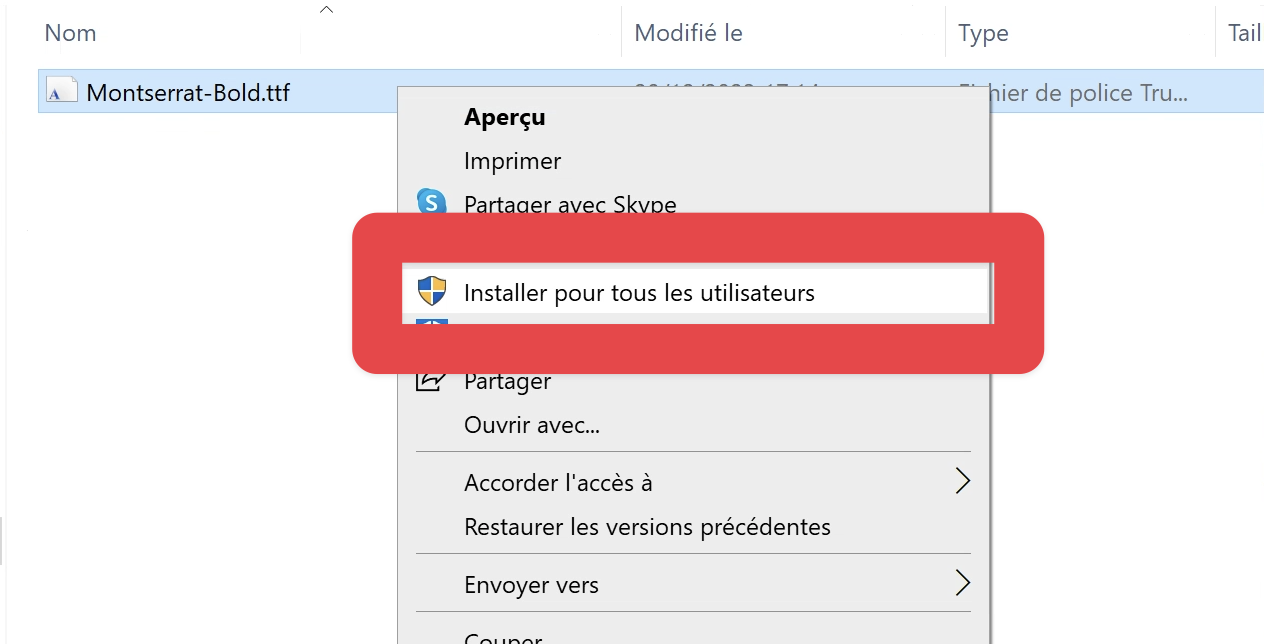
3. Install the Font
-
Open the downloaded
.zipfile and extract the font files into a folder on your computer. -
Right-click on the font files (
.ttfor.otf) and select Install for all users.
The font will now be installed on your system and ready to be used in AutoCut Captions as well as other applications on your Windows PC.
Conclusion
By installing your favorite Google Fonts, you can now give your AutoCut Captions a customized look that aligns with the branding or style of your project. With the font installed, you can easily use it directly in AutoCut Captions to create captivating and professionally styled subtitles.
Table of content